はじめに
以前学習した顔検出モデルをWebカメラからのリアルタイムデータを使って評価してみます。touch-sp.hatenablog.com
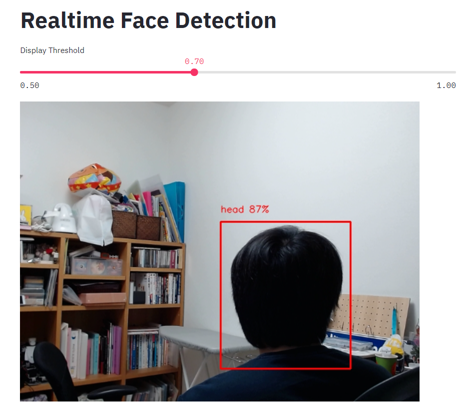
Streamlitのスライダーを使って検出閾値を変更しながら確認しています。
ただただStreamlitを使ってみたかったのが今回の動機です。Streamlitは初めて触ります。
結果
Pythonスクリプト
import streamlit as st
import cv2
import time
import numpy as np

from gluoncv import utils
import mxnet as mx

from autogluon.vision import ObjectDetector

@st.cache
def load_model():
    model = ObjectDetector.load('detector.ag')
    return model

detector = load_model()

st.markdown("# Realtime Face Detection")
thresh = st.slider('Display Threshold', 0.5, 1.0, 0.9, step=0.1)

# Load the webcam handler
cap = cv2.VideoCapture(0, cv2.CAP_DSHOW)
# letting the camera autofocus
time.sleep(1)

imageLocation = st.empty()

while True:
    ret, frame = cap.read()

    mx_frame = mx.nd.array(cv2.cvtColor(frame, cv2.COLOR_BGR2RGB)).astype('uint8')

    result = detector.predict(mx_frame)

    class_ids , class_names = result['predict_class'].factorize()

    bounding_boxes = np.array([[x[i] for i in x.keys()] for x in result['predict_rois']])

    scores = np.array(result['predict_score'])

    img = utils.viz.cv_plot_bbox(mx_frame, bounding_boxes, scores=scores,
                                labels=class_ids, class_names=class_names,
                                absolute_coordinates=False,
                                thresh=thresh)

    imageLocation.image(img)

    if cv2.waitKey(1) & 0xFF == ord("q"):
        break

cap.release()
非常に短いスクリプトで今回の目的を達成することができました。