結果
Z Image TruboやChromaと比較してみました。
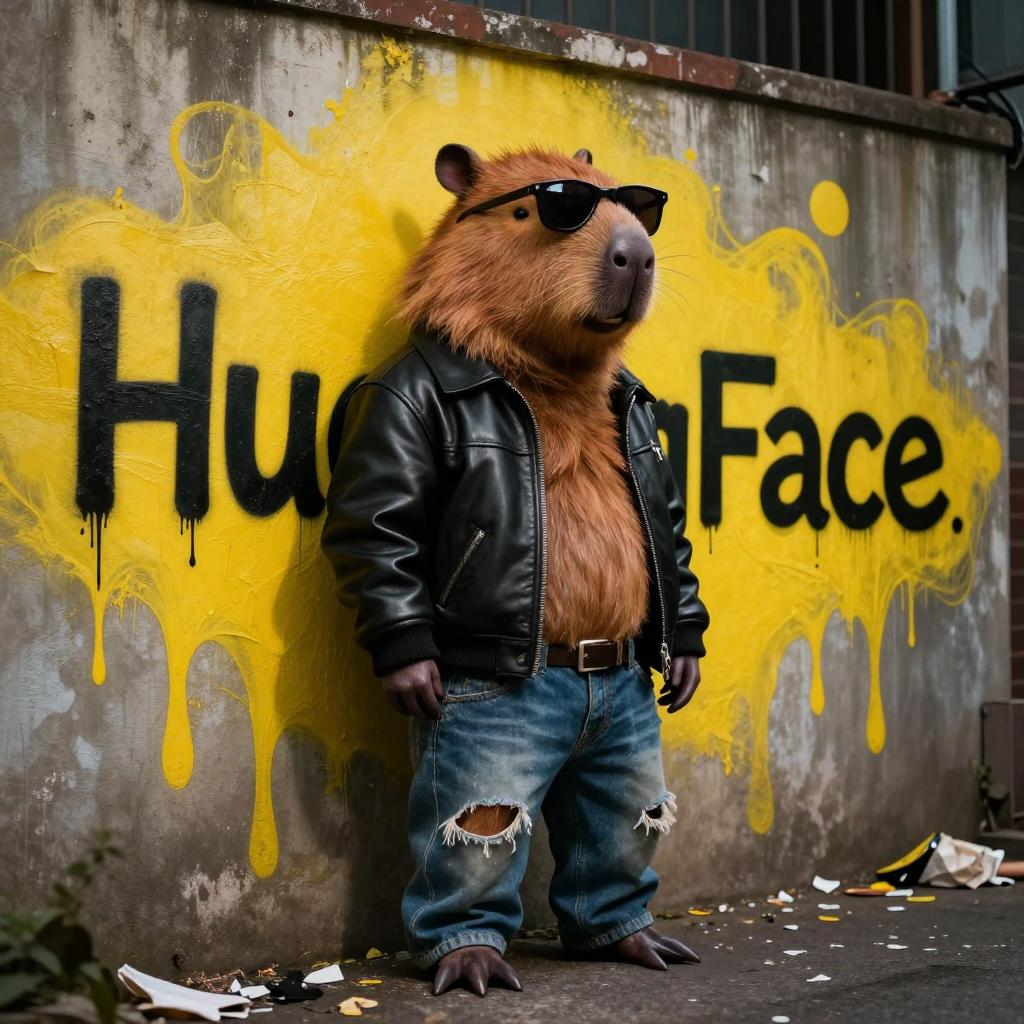
Ovis-Imageの結果

Z Image Turboの結果
こちらの記事を見て下さい。
Chromaの結果

こちらの記事を見て下さい。
Pythonスクリプト
import torch
from diffusers import OvisImagePipeline

pipe = OvisImagePipeline.from_pretrained(
    "AIDC-AI/Ovis-Image-7B",
    torch_dtype=torch.bfloat16
)

pipe.to("cuda")
pipe.enable_model_cpu_offload()

prompt = 'Ultra-realistic, high-quality photo of an anthropomorphic capybara with a tough, streetwise attitude, wearing a worn black leather jacket, dark sunglasses, and ripped jeans. The capybara is leaning casually against a gritty urban wall covered in vibrant graffiti. Behind it, in bold, dripping yellow spray paint, the word "HuggingFace" is scrawled in large street-art style letters. The scene is set in a dimly lit alleyway with moody lighting, scattered trash, and an edgy, rebellious vibe — like a character straight out of an underground comic book.'

image = pipe(
    prompt,
    negative_prompt="",
    num_inference_steps=50,
    guidance_scale=5.0
).images[0]

image.save("ovis_image.jpg")
環境構築
pyproject.tomlを載せておきます。 (バージョンはあえて固定しています)
uvを使うとuv syncだけで環境構築できると思います。
[project]
name = "ovis"
version = "0.1.0"
description = "Add your description here"
readme = "README.md"
requires-python = ">=3.13"
dependencies = [
    "accelerate==1.12.0",
    "diffusers==0.36.0",
    "hf-xet==1.2.0",
    "torch==2.9.1+cu126",
    "transformers==4.57.3",
]

[[tool.uv.index]]
name = "torch-cuda"
url = "https://download.pytorch.org/whl/cu126"
explicit = true

[tool.uv.sources]
torch = [{ index = "torch-cuda" }]