最終更新日:2023年8月2日
はじめに
SDXL 1.0はベースとリファイナーの2つのモデルからできています。今回はベースモデルとリファイナーモデルでそれぞれImage2Imageをやってみました。Text2ImageはSDXL 1.0のベースモデルを使わずに「BracingEvoMix_v1」を使っています。SDXL 1.0の基本的な使い方はこちらを参照して下さい。touch-sp.hatenablog.com
方法
Text2Image
from diffusers import StableDiffusionPipeline, EulerAncestralDiscreteScheduler
import torch
from compel import Compel, DiffusersTextualInversionManager

model_id = "model/BracingEvoMix_v1.safetensors"
pipe = StableDiffusionPipeline.from_single_file(
    model_id,
    load_safety_checker=False,
    extract_ema=True,
    torch_dtype=torch.float16)
pipe.scheduler = EulerAncestralDiscreteScheduler.from_config(pipe.scheduler.config)
pipe.load_textual_inversion("embeddings", weight_name="EasyNegative.safetensors", token="EasyNegative")
pipe.to("cuda")

prompt = "(high resolution)++, 8k+, photorealistic+, attractive, highly detailed, photo of pretty Japanese woman, short hair"
negative_prompt = "EasyNegative, (Worst Quality)++, (low quality)+"

textual_inversion_manager = DiffusersTextualInversionManager(pipe)
compel_proc = Compel(
    tokenizer=pipe.tokenizer,
    text_encoder=pipe.text_encoder,
    textual_inversion_manager=textual_inversion_manager,
    truncate_long_prompts=False)

prompt_embeds = compel_proc([prompt])
negative_prompt_embeds = compel_proc([negative_prompt])

generator = torch.Generator(device="cuda").manual_seed(20700)
image = pipe(
    prompt_embeds=prompt_embeds,
    negative_prompt_embeds = negative_prompt_embeds,
    generator=generator,
    num_inference_steps=25,
    guidance_scale=7.0,
    width=768,
    height=768
    ).images[0]
image.save("evo.png")
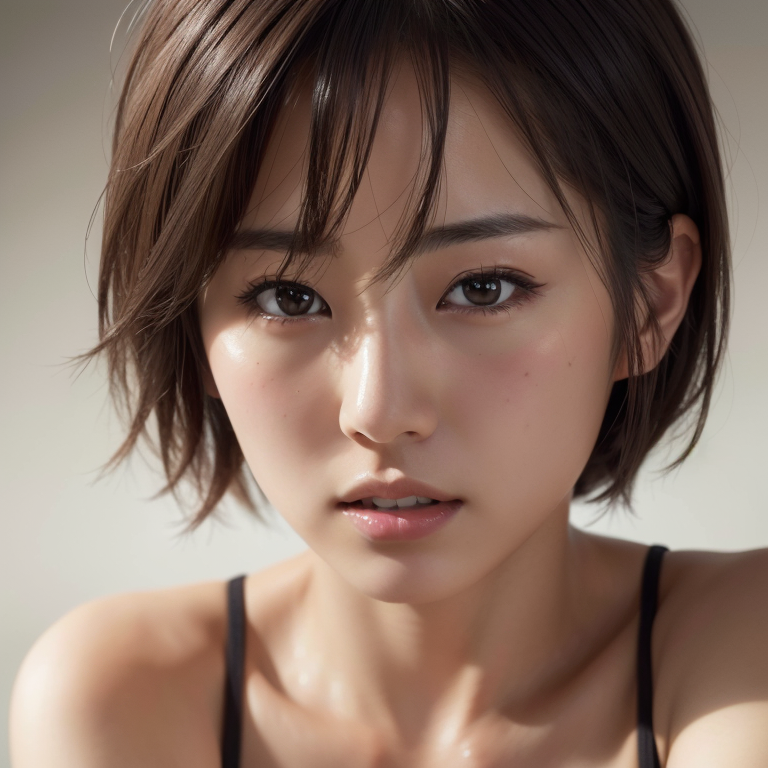
この画像を使ってImage2Imageを行います。
Image2Image
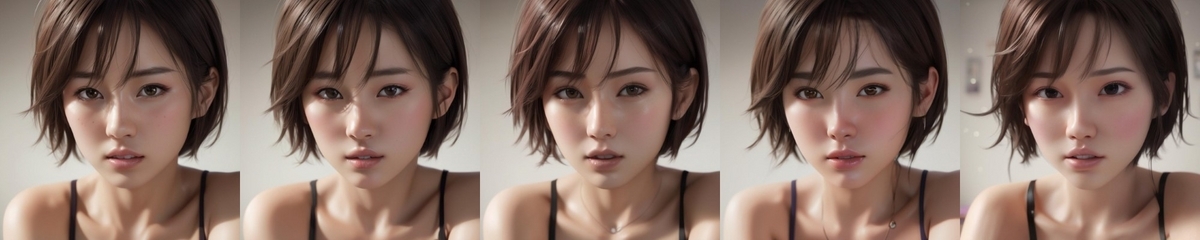
strengthを0.2→0.3→0.4→0.5→0.6と変更しながら画像を作成しています。ベースモデルを使う場合
import torch
from diffusers import AutoPipelineForImage2Image
from diffusers.utils import load_image

pipe = AutoPipelineForImage2Image.from_pretrained(
    "stabilityai/stable-diffusion-xl-base-1.0",
    torch_dtype=torch.float16,
    variant="fp16",
    use_safetensors=True
).to("cuda")

init_image = load_image("evo.png").resize((1024, 1024))

prompt = "masterpiece, best quality, high quality, 8k, kawaii princess"
negative_prompt = "worst quality, low quality, medium quality"

strength_list = [0.2, 0.3, 0.4, 0.5, 0.6]
for strength in strength_list:
    image = pipe(
        prompt=prompt,
        negative_prompt=negative_prompt,
        image=init_image,
        strength=strength).images[0]

    image.save(f"img2img_base_strength{strength}.png")
リファイナーモデルを使う場合
import torch
from diffusers import AutoPipelineForImage2Image
from diffusers.utils import load_image

pipe = AutoPipelineForImage2Image.from_pretrained(
    "stabilityai/stable-diffusion-xl-refiner-1.0",
    torch_dtype=torch.float16,
    variant="fp16",
    use_safetensors=True
).to("cuda")

init_image = load_image("evo.png").resize((1024, 1024))

prompt = "masterpiece, best quality, high quality, 8k, kawaii princess"
negative_prompt = "worst quality, low quality, medium quality"

strength_list = [0.2, 0.3, 0.4, 0.5, 0.6]
for strength in strength_list:
    image = pipe(
        prompt=prompt,
        negative_prompt=negative_prompt,
        image=init_image,
        strength=strength).images[0]

    image.save(f"img2img_refiner_strength{strength}.png")
結果
上の画像がベースモデル、下の画像がリファイナーモデルを使った結果です。左からstrengthを0.2→0.3→0.4→0.5→0.6と変更しています。
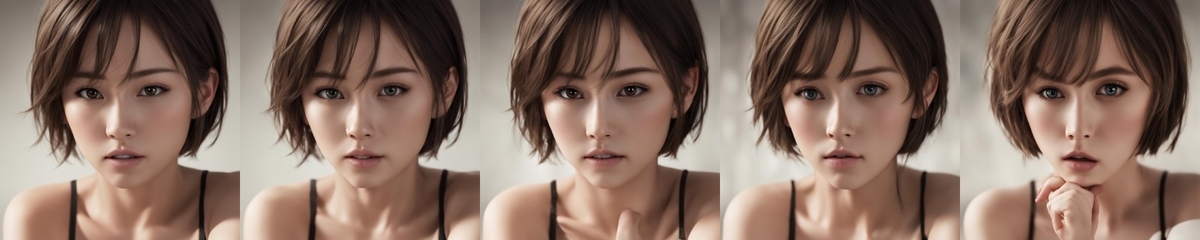
リファイナーを使った場合、strengthは0.5あたりから画像が乱れてきました。