最終更新日:2023年8月5日
はじめに
新しく公開されたSDXL 1.0をDiffusersから使ってみました。Diffusers公式のチュートリアルに従って実行してみただけです。環境
Windows 11
CUDA 11.7
Python 3.10
pip install torch==2.0.1+cu117 --index-url https://download.pytorch.org/whl/cu117
pip install diffusers[torch]
pip install invisible_watermark transformers
ベースモデルのみ
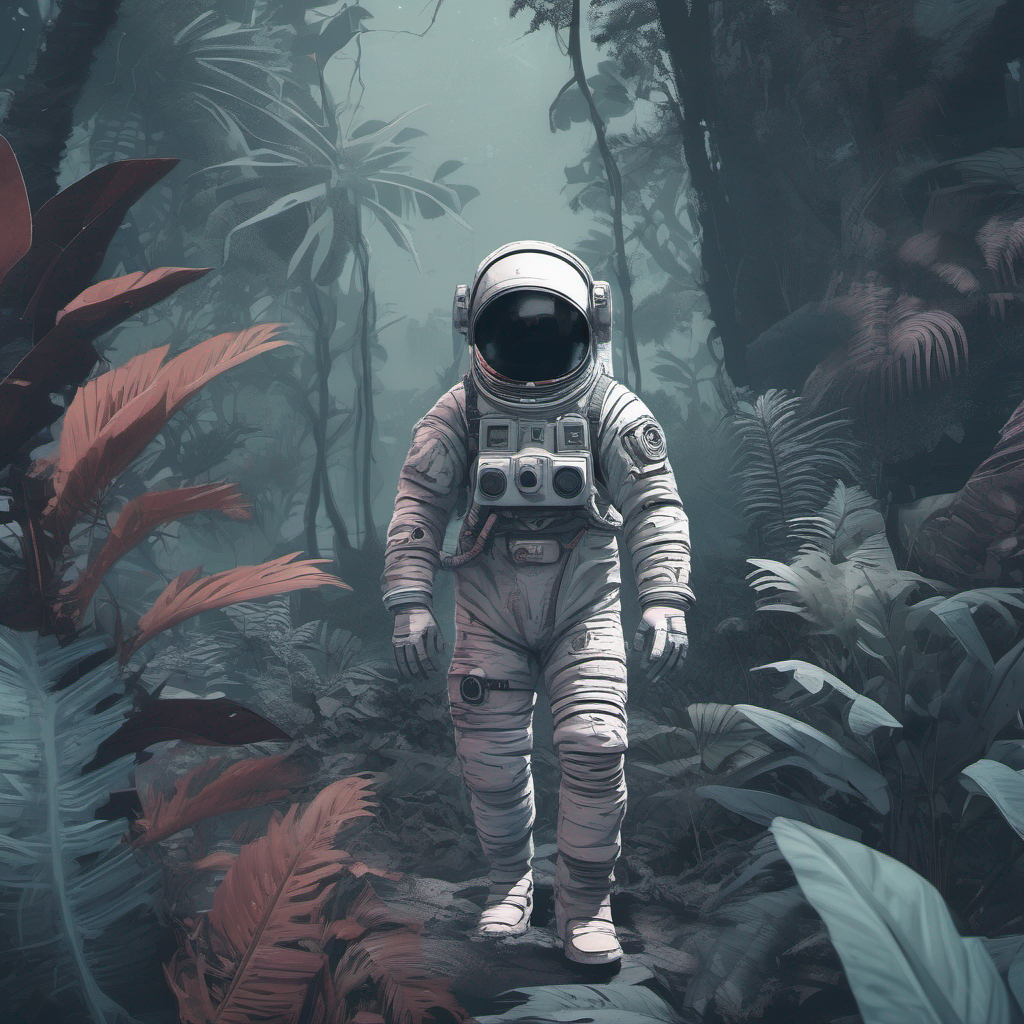
from diffusers import DiffusionPipeline
import torch

pipe = DiffusionPipeline.from_pretrained(
    "stabilityai/stable-diffusion-xl-base-1.0",
    torch_dtype=torch.float16,
    variant="fp16",
    use_safetensors=True
)
pipe.to("cuda")

prompt = "Astronaut in a jungle, cold color palette, muted colors, detailed, 8k"
seed = 20000
generator = torch.Generator(device="cuda").manual_seed(seed)
image = pipe(
    prompt=prompt,
    generator=generator).images[0]
image.save("result_0.png")
8.6GBのVRAMを使用して1024x1024の画像が作成されました。

「pipe.to("cuda")」を「pipe.enable_model_cpu_offload()」に変更するとVRAM使用量を減らせます。
おそらくVRAM 8GBでも動作できるようになると思います。
#pipe.to("cuda")
pipe.enable_model_cpu_offload()
ベースモデル + リファイナー
方法が二つあるようです。方法1
from diffusers import DiffusionPipeline
import torch

base = DiffusionPipeline.from_pretrained(
    "stabilityai/stable-diffusion-xl-base-1.0",
    torch_dtype=torch.float16,
    variant="fp16",
    use_safetensors=True
)
base.to("cuda")

refiner = DiffusionPipeline.from_pretrained(
    "stabilityai/stable-diffusion-xl-refiner-1.0",
    text_encoder_2=base.text_encoder_2,
    vae=base.vae,
    torch_dtype=torch.float16,
    variant="fp16",
    use_safetensors=True
)
refiner.to("cuda")

n_steps = 40
high_noise_frac = 0.8

prompt = "Astronaut in a jungle, cold color palette, muted colors, detailed, 8k"
seed = 20000
generator = torch.Generator(device="cuda").manual_seed(seed)
image = base(
    prompt=prompt,
    num_inference_steps=n_steps,
    denoising_end=high_noise_frac,
    output_type="latent",
    generator=generator
    ).images[0]
image = refiner(
    prompt=prompt,
    num_inference_steps=n_steps,
    denoising_start=high_noise_frac,
    image=image).images[0]
image.save("result_1.png")
15.8GBのVRAMを使用して1024x1024の画像が作成されました。


ベースモデル単独の時と少し画像が変わります。
(左がベースモデル単独)

方法2
from diffusers import DiffusionPipeline
import torch

base = DiffusionPipeline.from_pretrained(
    "stabilityai/stable-diffusion-xl-base-1.0",
    torch_dtype=torch.float16,
    variant="fp16",
    use_safetensors=True
)
base.to("cuda")

refiner = DiffusionPipeline.from_pretrained(
    "stabilityai/stable-diffusion-xl-refiner-1.0",
    text_encoder_2=base.text_encoder_2,
    vae=base.vae,
    torch_dtype=torch.float16,
    use_safetensors=True,
    variant="fp16"
)
refiner.to("cuda")

prompt = "Astronaut in a jungle, cold color palette, muted colors, detailed, 8k"
seed = 20000
generator = torch.Generator(device="cuda").manual_seed(seed)
image = base(
    prompt=prompt,
    output_type="latent",
    generator=generator).images[0]
image = refiner(
    prompt=prompt,
    image=image[None, :]).images[0]
image.save("result_2.png")
13.2GBのVRAMを使用して1024x1024の画像が作成されました。


ベースモデル単独の時とほとんど同じ画像が出来ます。洗練された感じでしょうか?
(左がベースモデル単独)

続きの記事
touch-sp.hatenablog.comtouch-sp.hatenablog.com
touch-sp.hatenablog.com
touch-sp.hatenablog.com
touch-sp.hatenablog.com
touch-sp.hatenablog.com