
はじめに
DiffusersにSDXL用のMulti-ControlNetが実装されたので使ってみました。元画像

元画像はぱくたそから使わせて頂きました。
こちらの画像です。
1024x1024になるようにトリミング、リサイズして「girl.jpg」として保存しています。
ここからImage2Imageを実行するのですが、手をきれいに描くためにその部分はCanny、顔や服装はバラエティを持たせるためにOpenPoseとしました。
方法
Canny画像とOpenPose画像の作成
Canny画像
import cv2
from PIL import Image

image = cv2.imread("girl.jpg")
image = cv2.Canny(image, 50, 150)
canny_image = Image.fromarray(image)
canny_image.save("canny.png")

OpenPose画像
from controlnet_aux.processor import Processor
from diffusers.utils import load_image

image = load_image("girl.jpg")

processor = Processor("openpose")
openpose_image = processor(image, to_pil=True).resize((1024, 1024))
openpose_image.save("pose.png")

マスク画像の作成
以下のようなマスク画像を作成します。手の部分が白塗りされています。
簡単に作成するためにPythonスクリプトを書きました。
こちらです→「multiple_square_mask.py」
python multiple_square_mask.py --image girl.jpg
マウスで囲ってスペースキーを押していくだけです。
マスク画像の適応
Canny画像に対してマスク画像を適用させます。
左二つの画像から右の画像を作成しました。
簡単に作成するためにPythonスクリプトを書きました。
こちらです→「apply_mask.py」
python apply_mask.py --mask girl_mask.png --image canny.png --reverse
Multi-ControlNetの実行
from diffusers import StableDiffusionXLControlNetPipeline, ControlNetModel, DPMSolverMultistepScheduler
from diffusers.utils import load_image
import torch

controlnets = [
    ControlNetModel.from_pretrained(
        "controlnet/controlnet-canny-sdxl-1.0",
        torch_dtype=torch.float16),
    ControlNetModel.from_pretrained(
        "controlnet/controlnet-openpose-sdxl-1.0",
        torch_dtype=torch.float16)
    ]

pipe = StableDiffusionXLControlNetPipeline.from_pretrained(
    "model/fudukiMix_v10_ema",
    controlnet=controlnets,
    torch_dtype=torch.float16
    )

pipe.scheduler = DPMSolverMultistepScheduler.from_config(
    pipe.scheduler.config,
    algorithm_type="sde-dpmsolver++",
    use_karras_sigmas=True
    )

pipe.to("cuda")

prompt = "pretty girl in the forest, 20yo, 8k, detailed"
negative_prompt = "worst quality, low quality"

images = [
    load_image("mask_canny.png"),
    load_image("pose.png")
    ]

seed = 30000
generator = torch.manual_seed(seed)

image = pipe(
    prompt=prompt,
    negative_prompt=negative_prompt,
    image=images,
    num_inference_steps=30,
    generator=generator,
    controlnet_conditioning_scale=[0.6, 0.6]
    ).images[0]

image.save("multi_controlnet_result.png")
結果
最後に「GFPGAN」で画像を処理しています。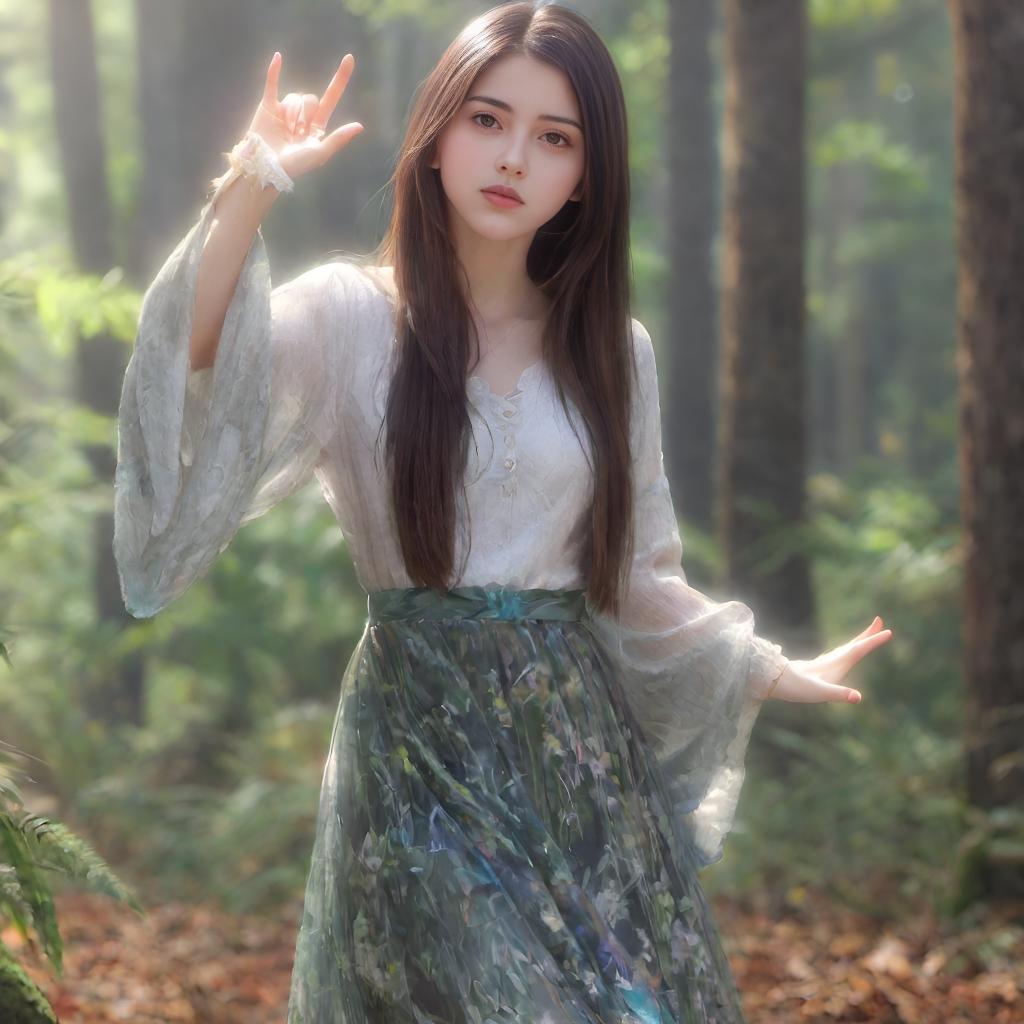
GFPGANの使い方はこちらを見て下さい。
touch-sp.hatenablog.com
その他
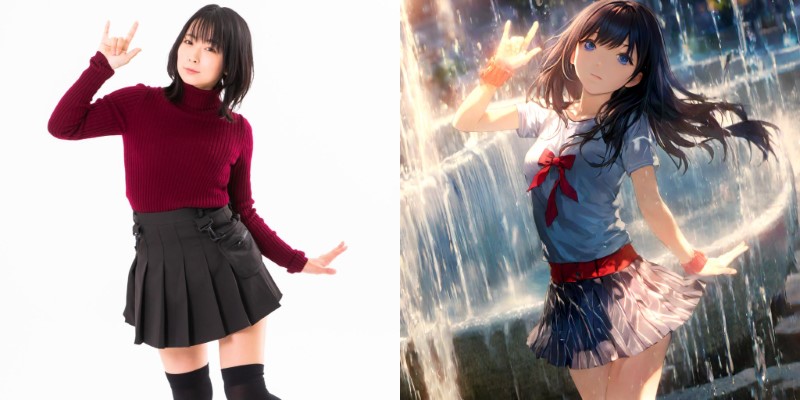
他のSDXL 1.0派生モデルとMulti-ControlNetCounterfeitXL v1.0
seed = 30000

prompt = "highres, ultra detailed, super fine illustration, japanese anime style, an extremely cute and beautiful girl, fountain background, highly detailed beautiful face and eyes"
negative_prompt = "worst quality, low quality, sketch"

controlnet_conditioning_scale=[0.6, 0.9]

暗い画像になってしまいました。
niji-diffusion-xl-base-1.0 v2.3
pipe.scheduler = EulerAncestralDiscreteScheduler.from_config(pipe.scheduler.config)

seed = 30000

prompt = "masterpiece, best quality, high quality, absurdres, 1girl, flower"
negative_prompt = "worst quality, low quality, sketch"

controlnet_conditioning_scale=[0.6, 1.0]

BreakDomainXL v03d
seed = 30000

prompt = "super fine illustration, anime style, an extremely cute and beautiful girl, fountain background, highly detailed beautiful face and eyes"
negative_prompt = "worst quality, low quality, sketch"

controlnet_conditioning_scale=[0.6, 1.0]
リボンが残念なことになってしまいました。
Animagine XL v1.0
seed = 30000

prompt = "super fine illustration, anime style, an extremely cute and beautiful girl, fountain background, highly detailed beautiful face and eyes"
negative_prompt = "worst quality, low quality, sketch"

controlnet_conditioning_scale=[0.6, 1.0]
