はじめに
以前「CartoonGAN」というのを使ってみました。touch-sp.hatenablog.com
今回はそれより新しい「Cartoon-GAN」を使ってみます。
github.com
結果
サンプル画像はこちらからダウンロードさせて頂きました。(Ben ThaiによるPixabayからの画像)

環境構築
GPUなし
Windows 10
Python 3.7.8
numpy==1.19.4を使用すると以下のエラーがでました。
ImportError: numpy.core.multiarray failed to import
そのためnumpy==1.19.3をインストールしています。
新しいPython環境で以下の順に実行すれば問題ありません。
pip install numpy==1.19.3
pip install torch==1.7.1+cpu torchvision==0.8.2+cpu torchaudio==0.7.2 -f https://download.pytorch.org/whl/torch_stable.html
pip install opencv-python
pip install tqdm
最終的にはこのようになりました。(pip freeze)
numpy==1.19.3
opencv-python==4.4.0.46
Pillow==8.0.1
torch==1.7.1+cpu
torchaudio==0.7.2
torchvision==0.8.2+cpu
tqdm==4.54.1
typing-extensions==3.7.4.3
GPUあり
1
Windows 11 + GTX 1080
python 3.8.10

colorama==0.4.4
numpy==1.21.2
opencv-python==4.5.3.56
Pillow==8.3.2
torch==1.8.1+cu102
torchvision==0.9.1+cu102
tqdm==4.62.3
typing-extensions==3.10.0.2
2
Windows 11 + RTX 3060 Laptop
python 3.8.10

colorama==0.4.4
numpy==1.21.4
opencv-python==4.5.4.58
Pillow==8.4.0
torch==1.10.0+cu113
torchvision==0.11.1+cu113
tqdm==4.62.3
typing_extensions==4.0.0
方法
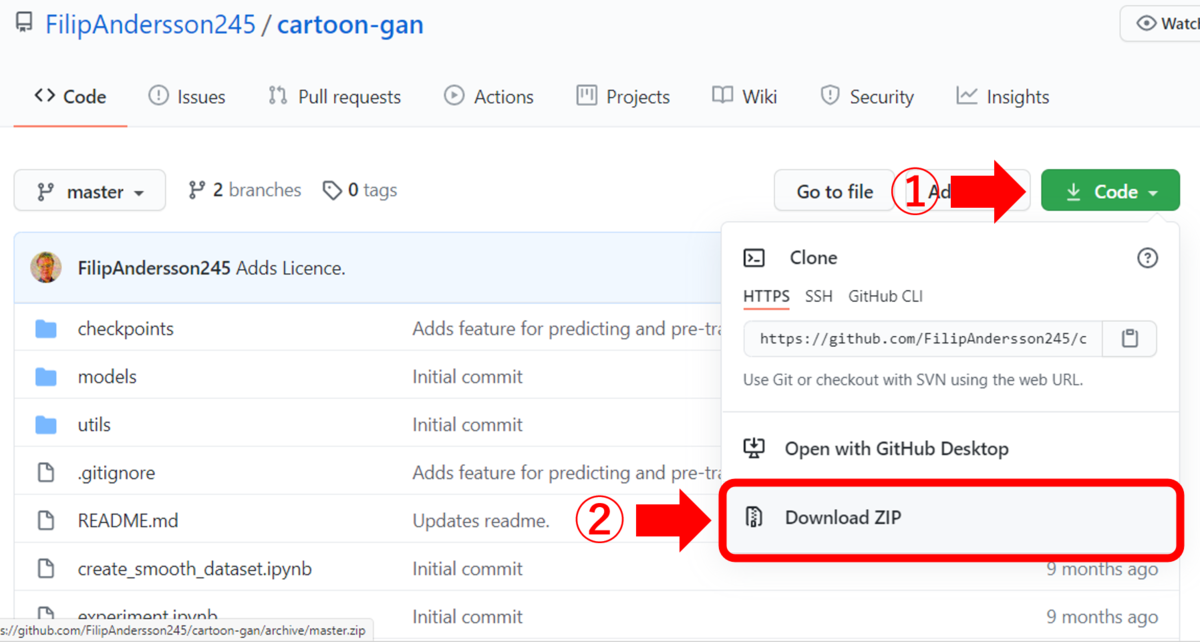
まずは上記GitHubをZIPでダウンロードして解凍します。
「cartoon-gan-master」というフォルダができます。
そこに元画像(今回は「sample.jpg」という名前)を入れます。
次に「checkpoints」フォルダのdownload_weights.htmlに従い学習済みデータをダウンロードします。
「trained_netG.pth」だけダウンロードすれば良いようです。
また、CPUのみで実行するためにはスクリプトを一部変更する必要がありました。
「predict.py」をエディタで開いて98行目を変更します。
- 変更前
netG.load_state_dict(torch.load(pretrained_dir))
- 変更後
netG.load_state_dict(torch.load(pretrained_dir,map_location=torch.device('cpu')))
あとは「cartoon-gan-master」フォルダ内で以下を実行するのみです。
- GPUなし
python predict.py -i sample.jpg -o output_image.jpg -d cpu
- GPUあり
python predict.py -i sample.jpg -o output_image.jpg -d cuda
自分の環境では以下のエラーが出ました。
Microsoft Visual C++ Redistributable is not installed, this may lead to the DLL load failure.
It can be downloaded at https://aka.ms/vs/16/release/vc_redist.x64.exe