はじめに
以前MXNetとGluonCVを使ってやったことをPyTorchでやることによってPyTorchの勉強を進めます。今回はObject Trackingです。これによって物体検出モデルの学習データが効率よく作成できることを以前証明しました。- GluonCVでObject Tracking(SiamRPN models) - パソコン関連もろもろ
- 物体検出モデルのファインチューニング(Object Trackingの結果を用いて) - パソコン関連もろもろ
- 敵ロボット検出を学習する(めざせ!ROBO-ONE auto出場) - パソコン関連もろもろ
Object Trackingはこちらを使わせて頂きました。
github.com
開発がすでに終了したのか最近更新されていません。しかし、Windowsと現時点で最新のPyTorchの環境で問題なく動作しました。
環境
GPUあり
Windows 11
Core i7-7700K + GTX 1080

Python 3.8.10
新しいPython仮想環境を作り以下をインストールしました。
pip install torch==1.9.1+cu102 torchvision==0.10.1+cu102 torchaudio===0.9.1 -f https://download.pytorch.org/whl/torch_stable.html
pip install opencv-python
pip install yacs
Pythonの環境構築はこれだけで終了です。このようになりました。
numpy==1.21.2
opencv-python==4.5.3.56
Pillow==8.4.0
PyYAML==6.0
torch==1.9.1+cu102
torchaudio==0.9.1
torchvision==0.10.1+cu102
typing-extensions==3.10.0.2
yacs==0.1.8
GPUなし
Windows 10
Core i7-1165G7

Python 3.8.10
新しいPython仮想環境を作り以下をインストールしました。
pip install torch torchvision torchaudio
pip install opencv-python
pip install yacs
Pythonの環境構築はこれだけで終了です。このようになりました。
numpy==1.21.2
opencv-python==4.5.3.56
Pillow==8.4.0
PyYAML==6.0
torch==1.9.1
torchaudio==0.9.1
torchvision==0.10.1
typing-extensions==3.10.0.2
yacs==0.1.8
ソースコードのダウンロード
gitが使えるならgit clone、使えないならGitHubページからZIP形式でダウンロードして解凍すれば良いです。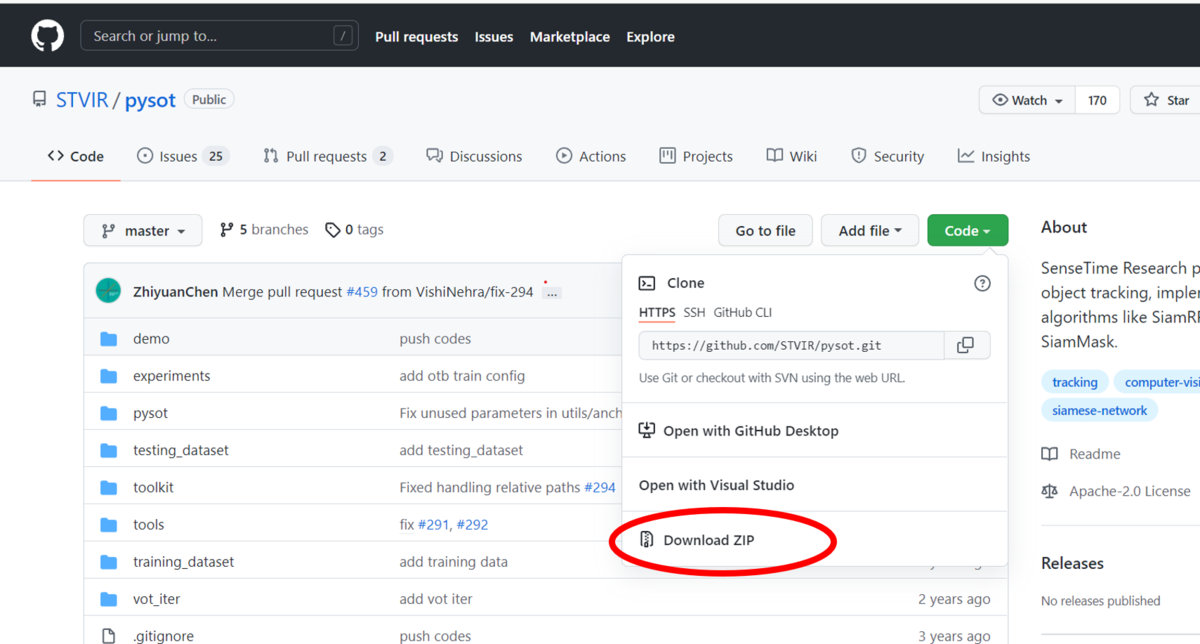
学習済みモデルのダウンロード
Model Zooが用意されておりそちらからダウンロード可能です。github.com
今回は「siamrpn_r50_l234_dwxcorr」というモデルをダウンロードしました。
「model.pth」という名前のファイルがダウンロードされます。以下のフォルダに入れておきます。
pysot >> experiments >> siamrpn_r50_l234_dwxcorr >> model.pth
Pythonスクリプト
Tracking結果がVOCフォーマットで出力されるように以下のPythonスクリプトを新たに書きました。実行する時のカレントディレクトリは一つ目のpysotにしておく必要があります。推奨されているインストール手順を省略しているので、そうしないと以下のimportに失敗します。from pysot.core.config import cfg from pysot.models.model_builder import ModelBuilder from pysot.tracker.tracker_builder import build_tracker
最終的なスクリプト
実行すると画面が表示されるのでTrackingしたい物体をマウスで囲ってください。スペースキーを押すとそれ以降のスクリプトが実行されます。
import os

import cv2
import torch
import xml.etree.ElementTree as ET

from pysot.core.config import cfg
from pysot.models.model_builder import ModelBuilder
from pysot.tracker.tracker_builder import build_tracker

#=========================================================
video_name = 'demo/bag.avi'

target_name = 'target'

out_path = 'train_data'

config = 'experiments/siamrpn_r50_l234_dwxcorr/config.yaml'
snapshot = 'experiments/siamrpn_r50_l234_dwxcorr/model.pth'
#=========================================================

annotation_dir = os.path.join(out_path, 'Annotations')
main_dir =  os.path.join(out_path, 'ImageSets/Main')
jpegimages_dir = os.path.join(out_path, 'JPEGImages')

os.makedirs(annotation_dir)
os.makedirs(main_dir)
os.makedirs(jpegimages_dir)

# 映像ファイルを読み込む
video_frames = []
cap = cv2.VideoCapture('demo/bag.avi')
while(True):
    ret, img = cap.read()
    if not ret:
        break
    video_frames.append(img)
cap.release()

# モデルを取得する
cfg.merge_from_file(config)
cfg.CUDA = torch.cuda.is_available() and cfg.CUDA
device = torch.device('cuda' if cfg.CUDA else 'cpu')
model = ModelBuilder()
model.load_state_dict(torch.load(snapshot,
    map_location=lambda storage, loc: storage.cpu()))
model.eval().to(device)
tracker = build_tracker(model)

#最初の位置を取得する
init_rect = cv2.selectROI(video_name, video_frames[0], False, False)

#トラッキングを実行
jpeg_filenames_list = []

for ind, frame in enumerate(video_frames):
    if ind == 0:
        tracker.init(frame, init_rect)
        bbox = init_rect
    else:
        outputs = tracker.track(frame)
        bbox = list(map(int, outputs['bbox']))
        '''
        cv2.rectangle(frame, (bbox[0], bbox[1]),
                        (bbox[0]+bbox[2], bbox[1]+bbox[3]),
                        (0, 255, 0), 3)
        cv2.imshow(video_name, frame)
        cv2.waitKey(1)
        '''
    filename = '%06d'%(ind)

    #画像の保存
    jpeg_filename = filename + '.jpg'
    cv2.imwrite(os.path.join(jpegimages_dir, jpeg_filename), frame)

    #テキストファイルの作成
    jpeg_filenames_list.append(filename)

    #XMLファイルの保存
    xml_filename = filename + '.xml'

    new_root = ET.Element('annotation')

    new_filename = ET.SubElement(new_root, 'filename')
    new_filename.text = jpeg_filename

    Size = ET.SubElement(new_root, 'size')
    Width = ET.SubElement(Size, 'width')
    Height = ET.SubElement(Size, 'height')
    Depth = ET.SubElement(Size, 'depth')

    Width.text = str(frame.shape[1])
    Height.text = str(frame.shape[0])
    Depth.text = str(frame.shape[2])

    Object = ET.SubElement(new_root, 'object')

    Name = ET.SubElement(Object, 'name')
    Name.text = target_name

    Difficult = ET.SubElement(Object, 'difficult')
    Difficult.text = '0'

    Bndbox = ET.SubElement(Object, 'bndbox')
    Xmin = ET.SubElement(Bndbox, 'xmin')
    Ymin = ET.SubElement(Bndbox, 'ymin')
    Xmax = ET.SubElement(Bndbox, 'xmax')
    Ymax = ET.SubElement(Bndbox, 'ymax')

    Xmin.text = str(bbox[0])
    Ymin.text = str(bbox[1])
    Xmax.text = str(bbox[0]+bbox[2])
    Ymax.text = str(bbox[1]+bbox[3])

    new_tree = ET.ElementTree(new_root)

    new_tree.write(os.path.join(annotation_dir, xml_filename))

#テキストファイルの保存
text = "\n".join(jpeg_filenames_list)
with open(os.path.join(main_dir, 'train.txt'), "w") as f:
    f.write(text)

cv2.destroyAllWindows()
結果
実行がうまくいくと「train_data」というフォルダが出力されます。VOCフォーマットになっているのでこのまま物体検出モデルの転移学習に使えるはずです。PyTorchでの転移学習はこれから学習します。さいごに
間違いや改善点があればコメント頂けましたら幸いです。2021年10月19日追記
つづきを書きました。touch-sp.hatenablog.com