はじめに
以前にこのような記事を書きました。touch-sp.hatenablog.com
touch-sp.hatenablog.com
今回は二つの記事を合体させて簡単なカメラアプリを作ります。
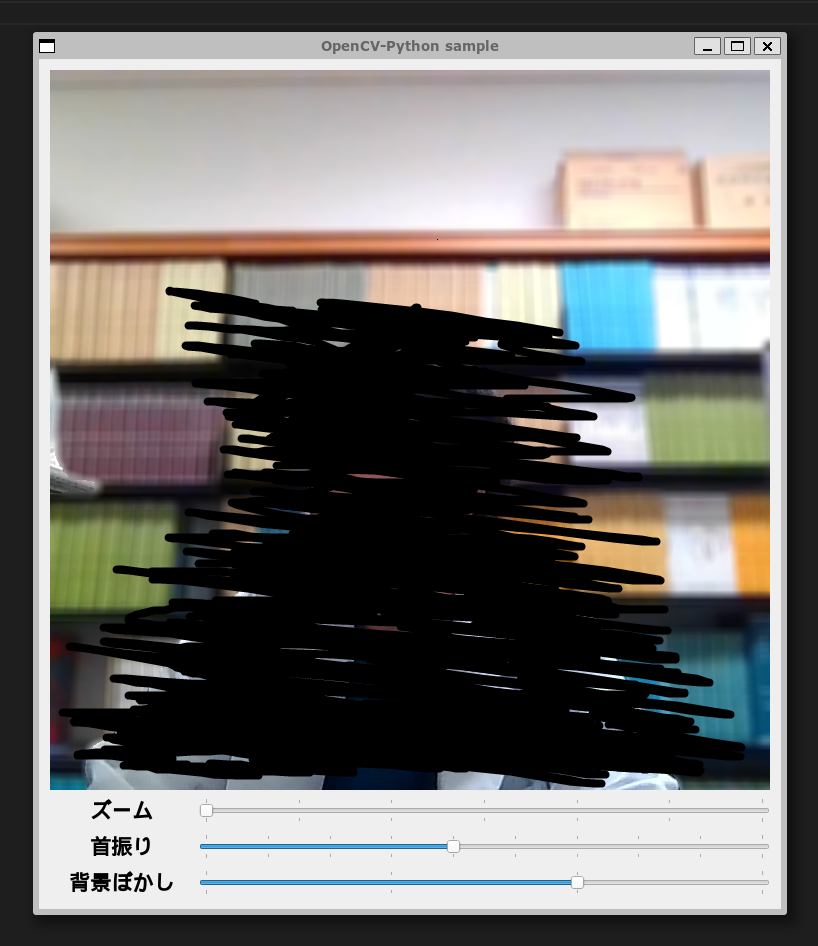
完成図

ズームと首振りと背景ぼかしに対応しています。
ズームと首振りはなんちゃってです。
touch-sp.hatenablog.com
touch-sp.hatenablog.com
PythonスクリプトとYAMLファイル
Pythonスクリプト
import numpy as np
import torch
from torchvision import transforms
import cv2
from PyQt6.QtCore import pyqtSignal, pyqtSlot, QThread
from PyQt6.QtWidgets import QWidget, QApplication, QLabel, QSlider, QGridLayout
from PyQt6.QtGui import QImage, QPixmap

from constructGUI import construct

device = 'cuda' if torch.cuda.is_available() else 'cpu'

transform_fn = transforms.Compose([
    transforms.ToTensor(),
    transforms.Normalize([.485, .456, .406], [.229, .224, .225]),
])

model = torch.hub.load('pytorch/vision:v0.10.0', 'deeplabv3_resnet50', pretrained=True)
model.eval().to(device)

class VideoThread(QThread):

    change_pixmap_signal = pyqtSignal(QImage)
    playing = True

    cap = cv2.VideoCapture(0)
    cap.set(cv2.CAP_PROP_FOURCC, cv2.VideoWriter_fourcc('M', 'J', 'P', 'G'))
    cap.set(cv2.CAP_PROP_FRAME_WIDTH, 1280)
    cap.set(cv2.CAP_PROP_FRAME_HEIGHT, 720)

    crop = 0
    leftside = 280
    bokashi = 0

    def run(self):

        while self.playing:
            ret, frame = self.cap.read()

            frame = frame[:, self.leftside:self.leftside+720, :]

            if not self.crop == 0:
                frame = cv2.resize(frame[self.crop:-self.crop, self.crop:-self.crop, :], dsize = (720, 720))

            if not self.bokashi == 0:
                frame_rgb = cv2.cvtColor(frame, cv2.COLOR_BGR2RGB)
                input_tensor = transform_fn(frame_rgb)
                input_batch = input_tensor.unsqueeze(0)

                with torch.no_grad():
                    output = model(input_batch.to(device))['out'][0]

                predict = output.argmax(0).to('cpu').numpy()

                mask_1 = np.where(predict == 15, 1, 0)[...,np.newaxis]
                mask_2 = np.where(predict == 15, 0, 1)[...,np.newaxis]
                if self.bokashi ==0:
                    blurred_img = cv2.blur(frame, (1, 1))
                else:
                    blurred_img = cv2.blur(frame, (self.bokashi, self.bokashi))
                frame = (frame * mask_1 + blurred_img * mask_2).astype('uint8')

            h, w, ch = frame.shape
            bytesPerLine = ch * w
            image = QImage(frame.copy(), w, h, bytesPerLine, QImage.Format.Format_BGR888)

            self.change_pixmap_signal.emit(image)

        self.cap.release()

    def stop(self):
        self.playing = False
        self.wait()

    def set_zoom_scale(self, x):
        self.crop = x

    def set_move_scale(self, x):
        self.leftside = x

    def set_bokashi_scale(self, x):
        self.bokashi = x

class Window(QWidget):

    def __init__(self):
        super().__init__()
        self.initUI()
        self.thread = VideoThread()
        self.thread.change_pixmap_signal.connect(self.update_image)
        self.thread.start()

    def initUI(self):
        self.setWindowTitle("OpenCV-Python sample")

        self.img_label1 = construct(QLabel(), 'settings.yaml', 'img_label')

        self.zoom_label = construct(QLabel('ズーム'), 'settings.yaml', 'text_label')
        self.move_label = construct(QLabel('首振り'), 'settings.yaml', 'text_label')
        self.bokashi_label = construct(QLabel('背景ぼかし'), 'settings.yaml', 'text_label')

        self.zoom_slider = construct(QSlider(), 'settings.yaml', 'zoom_slider')
        self.zoom_slider.valueChanged.connect(self.zoom_slider_change)

        self.move_slider = construct(QSlider(), 'settings.yaml', 'move_slider')
        self.move_slider.valueChanged.connect(self.move_slider_change)

        self.bokashi_slider = construct(QSlider(), 'settings.yaml', 'bokashi_slider')
        self.bokashi_slider.valueChanged.connect(self.bokashi_slider_change)

        self.grid = QGridLayout()

        self.grid.addWidget(self.img_label1, 0, 0, 1, 5)
        self.grid.addWidget(self.zoom_label, 1, 0)
        self.grid.addWidget(self.zoom_slider, 1, 1, 1, 4)
        self.grid.addWidget(self.move_label, 2, 0)
        self.grid.addWidget(self.move_slider, 2, 1, 1, 4)
        self.grid.addWidget(self.bokashi_label, 3, 0)
        self.grid.addWidget(self.bokashi_slider, 3, 1, 1, 4)

        self.setLayout(self.grid)

    def closeEvent(self, e):
       self.thread.stop()
       e.accept()

    def zoom_slider_change(self):
        self.thread.set_zoom_scale(self.zoom_slider.value() * 30)

    def move_slider_change(self):
        self.thread.set_move_scale(self.move_slider.value() * 70)

    def bokashi_slider_change(self):
        self.thread.set_bokashi_scale(self.bokashi_slider.value() * 5)

    @pyqtSlot(QImage)
    def update_image(self, image):
        self.img_label1.setPixmap(QPixmap.fromImage(image))

if __name__ == "__main__":
    app = QApplication([])
    ex =Window()
    ex.show()
    app.exec()
YAMLファイル
YAMLファイルを読み込む方法はこちらを参照して下さい。touch-sp.hatenablog.com
img_label:
  type: QLabel
  width: 720
  height: 720

text_label:
  type: QLabel
  alignment: center
  fontFamily: times
  fontPoint: 16
  fontBold: True

button:
  type: QPushButton
  fontFamily: times
  fontPoint: 20
  fontBold: True

zoom_slider:
  type: QSlider
  orientation: h  #(h or v)
  max: 6
  min: 0
  default: 0
  tickposition: both  #(above, below, left, right or both)

move_slider:
  type: QSlider
  orientation: h  #(h or v)
  max: 8
  min: 0
  default: 4
  tickposition: both  #(above, below, left, right or both)

bokashi_slider:
  type: QSlider
  orientation: h  #(h or v)
  max: 3
  min: 0
  default: 0
  tickposition: both  #(above, below, left, right or both)
環境
Ubuntu 20.04 on WSL2 (Windows 11)
WSL バージョン: 0.56.2.0
カーネル バージョン: 5.10.102.1
WSLg バージョン: 1.0.30
MSRDC バージョン: 1.2.2924
Direct3D バージョン: 1.601.0
Windows バージョン: 10.0.22000.593
Python 3.9.5
certifi==2021.10.8
charset-normalizer==2.0.12
idna==3.3
numpy==1.22.3
opencv-python==4.5.5.64
Pillow==9.0.1
pkg_resources==0.0.0
PyQt6==6.2.3
PyQt6-Qt6==6.2.4
PyQt6-sip==13.2.1
PyYAML==6.0
requests==2.27.1
torch==1.11.0+cu113
torchvision==0.12.0+cu113
typing_extensions==4.1.1
urllib3==1.26.9
カーネルは独自にビルドしています。こちらを参照して下さい。
touch-sp.hatenablog.com
つづき
つづきを書きました。touch-sp.hatenablog.com