
はじめに
前回はstable-diffusion-2-depthを使ってイラストを加工しました。touch-sp.hatenablog.com
今回はwaifu diffusionを使ってみます。
画像を大量に生成するために使用したPythonスクリプトはこちらです。
prompt
今回もpromptは最初に固定します。prompt
masterpiece
best quality
high quality
1girl
pen
desk
notebook
negative prompt
worst quality low quality medium quality normal quality
deleted
lowres
bad anatomy
mutated hands bad hands missing hands extra hands liquid hands poorly drawn hands
mutated fingers bad fingers missing fingers extra fingers liquid fingers poorly drawn fingers
cropped
jpeg artifacts
signature
watermark
blurry
パラメーター
strength
guidance_scale 9.5に固定してstrengthを0.6から0.9までの間で変動させてみました。python img2img.py --image study.jpg --negative_prompt --scale 9.5 --seed 20000 --strength 0.6 0.7 0.8 0.85 0.9
左から元画像→0.6→0.7→0.8と変えたのがこちらです。
strength 0.8あたりでガラッとイメージが変わる印象です。

0.85、0.9の時の画像がこちらです。
0.8から0.9の間が良さそうです。
seed
strength 0.9、guidance_scale 9.5に固定してseedを20000から20099まで1ずつ変化させました。python img2img.py --image study.jpg --negative_prompt --scale 9.5 --strength 0.9 --seed 20000 --n_samples 100
100枚の画像から良さそうなものを抽出したのがこちらです(seed: 20002)

guidance_scale
strength 0.9、seed 20002に固定してguidance_scaleやnum_inference_stepsをいろいろ変化させて出来の良いのを見つけました。python img2img.py --image study.jpg --negative_prompt --strength 0.9 --seed 20002 --scale 8.5 9.5 10.5 --steps 40 45 50 55 60
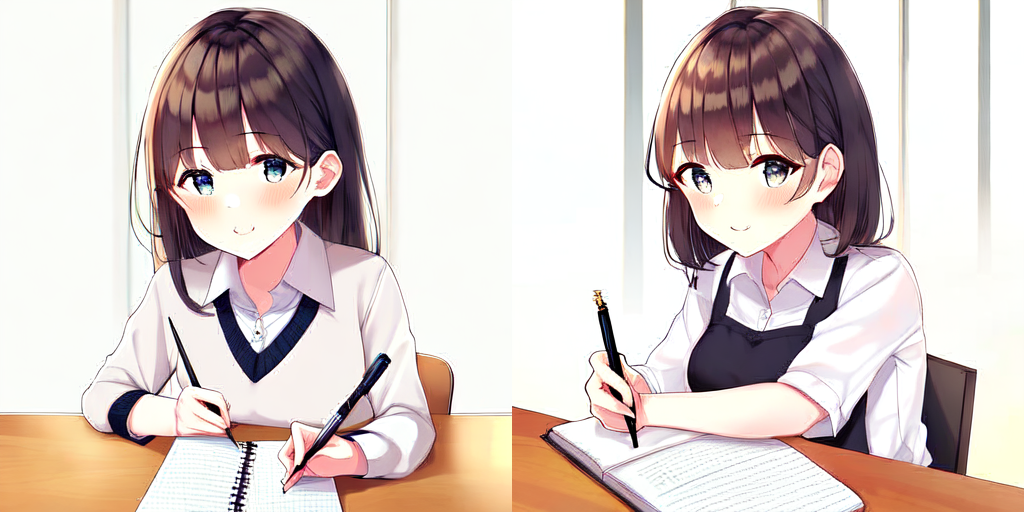
結果
鉛筆を持つ右手をうまく描画するのはまだまだ難しいようです。
最終的なパラメーターです。
seed: 20002
strength: 0.9
guidance_scale: 10.5
num_inference_steps: 55